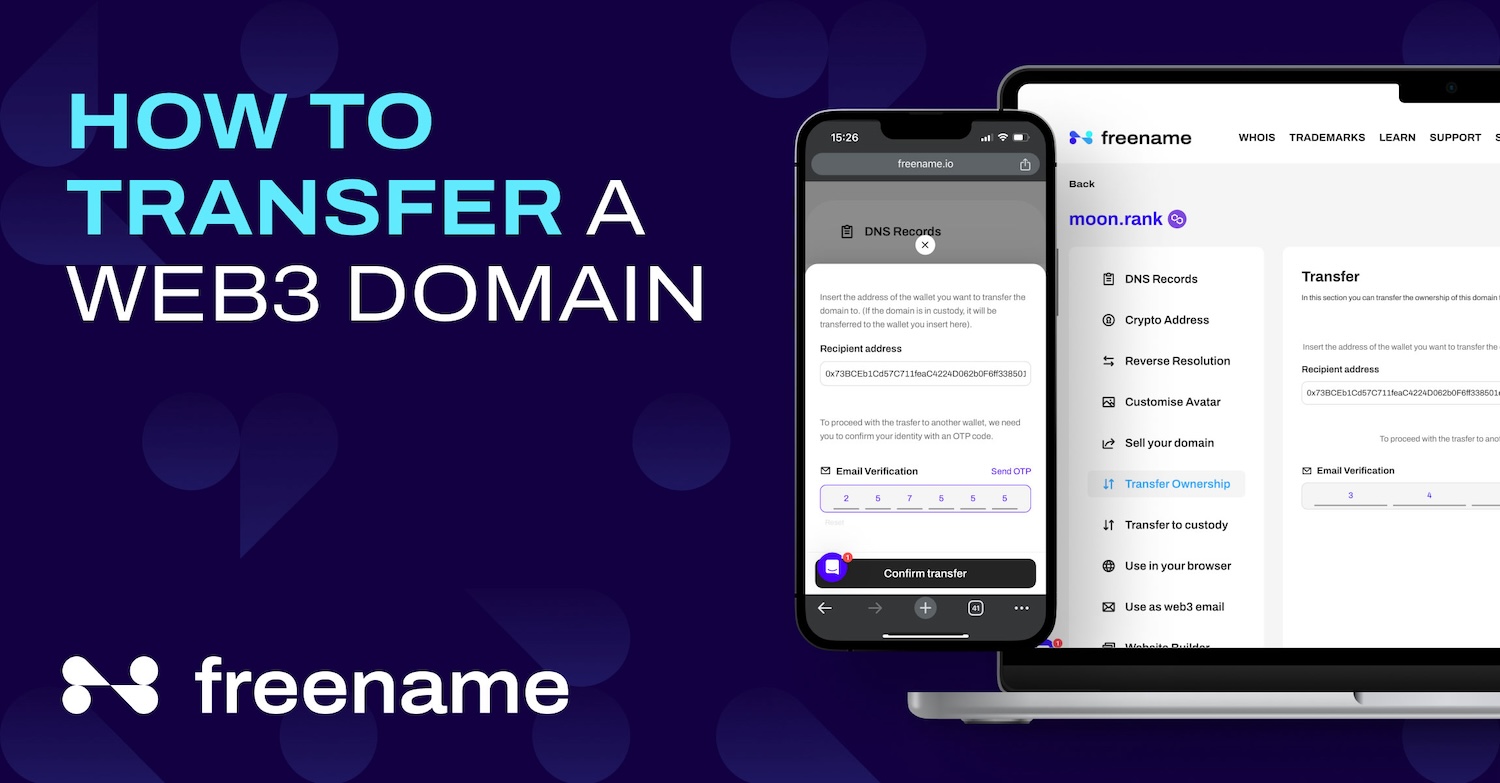
Transferring Web3 domains can seem daunting, but with the right guidance, it’s a straightforward process. Whether you’re moving to a new platform or transferring ownership, this step-by-step guide will walk you through everything you need to know.
By using Freename, you can ensure your domain transfer is smooth, secure, and efficient. Let’s explore how you can effortlessly transfer your Web3 domains.
What Are the Prerequisites for Transferring Web3 Domains?
Before diving into the process of transferring Web3 domains, it’s essential to have the right tools and prepare your domain properly to ensure a smooth transfer. Here’s what you need to get started.
Necessary Tools and Accounts
- Digital Wallets: To manage and transfer Web3 domains, you’ll need a digital wallet that supports the relevant blockchain. Popular options include MetaMask and Trust Wallet. These wallets are essential for storing your Web3 domain and performing transactions securely.
- Access to a Web3 Domain Registrar: You’ll also need access to a Web3 domain registrar, such as Freename. Freename provide the platform and tools necessary to register, manage, and transfer your Web3 domains. Ensure that you have an active account before proceeding.
Preparing Your Domain for Transfer
- Ensuring Domain Ownership: Before initiating a transfer, make sure you are the owner of the domain. This usually involves logging into your digital wallet and verifying that the domain is listed under your assets. If you’ve recently acquired the domain, ensure that it has been fully transferred to your wallet and is under your control.
- Checking for Transfer Restrictions: Different registrars and blockchain networks may have specific rules and restrictions regarding domain transfers. Check if there are any lock periods, restrictions, or pending obligations (like unpaid fees) that might prevent the transfer. Additionally, ensure that the domain is not currently involved in any disputes.
Step-by-Step Guide to Transfer Web3 Domains on Freename
Transferring a Web3 domain on Freename is a straightforward process, provided you follow the necessary steps. Here’s a detailed guide to help you transfer your domain seamlessly.
Prerequisite for Transferring a Web3 Domain: Minting the Domain
Before you can transfer a domain on Freename, it must be minted. Minting is the process of registering the domain on the blockchain, ensuring it is recognized and can be transferred.
Step-by-Step Transfer Process on Freename
1. Log in to your Freename account
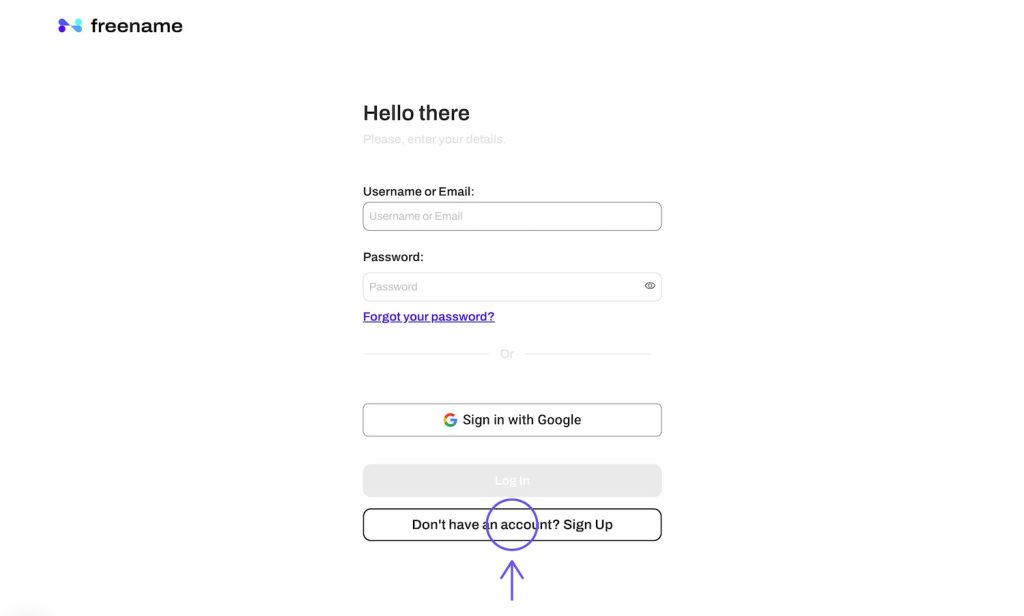
- Open your preferred web browser and navigate to the Freename website.
- Enter your username and password in the respective fields on the login page.
- Click the “Log In” button to access your account dashboard.
2. Navigate to your portfolio where all your registered domains are listed
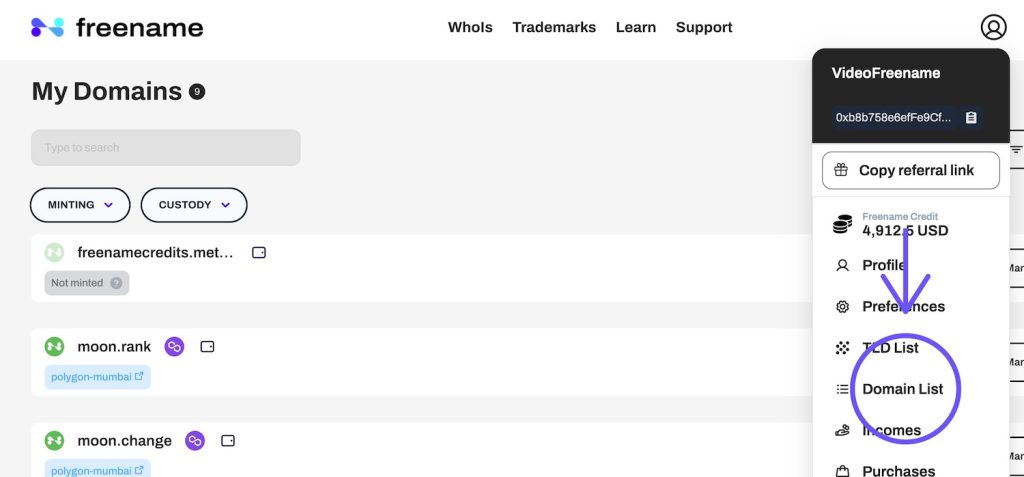
- Once logged in, locate the navigation menu on the dashboard.
- Click on the “Portfolio” tab to view a list of all the domains you currently own.
- Ensure you can see the details of each domain, including their registration status and expiration dates.
3. Choose the specific Top-Level Domain (TLD) or individual domain you wish to transfer from your portfolio

- Scroll through your portfolio to find the domain you want to transfer.
- Click on the domain name to access its detailed settings and management options.
- Verify that this is the correct domain you intend to transfer to avoid any mistakes.
4. In the transfer settings, you will be prompted to enter the recipient’s cryptocurrency wallet address
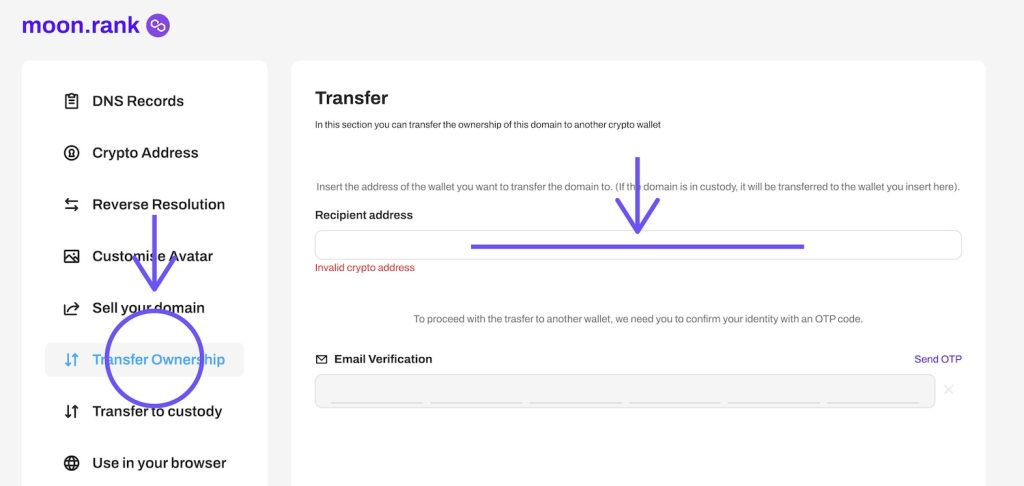
- Look for the “Transfer” or “Transfer Domain” option within the domain’s settings.
- Enter the recipient’s cryptocurrency wallet address in the designated field.
- Double-check the wallet address for accuracy to prevent any loss of assets during the transfer.
5. To confirm the transfer, an OTP (One-Time Password) code will be sent to your registered email address
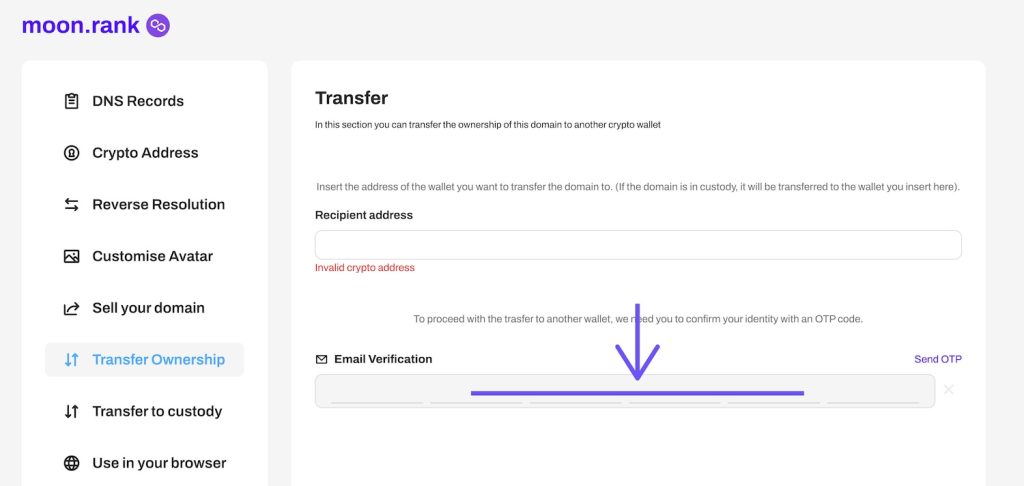
- Ensure your registered email address is accessible and up-to-date.
- Monitor your email inbox for the arrival of the OTP code sent by Freename.
- Check your spam or junk folder if you do not receive the email within a few minutes.
- Retrieve the OTP code from your email and paste it into the confirmation field on the Freename platform
- Open the email containing the OTP code sent by Freename.
- Copy the OTP code from the email.
- Return to the Freename platform and paste the code into the designated confirmation field.
- After pasting the OTP code, review all entered details to ensure they are correct.
- Click the “Submit” or “Confirm Transfer” button to complete the process.
- Wait for a confirmation message from Freename indicating that the transfer has been successfully processed.
| By following these steps, you can ensure a successful transfer of your Web3 domain to the recipient’s wallet on the Freename platform. Always double-check the recipient’s wallet address and the OTP code to avoid any errors and ensure a smooth transfer process. |
Important Considerations When Transferring Web3 Domains
When transferring Web3 domains on Freename, there are a few important factors to keep in mind to ensure a smooth process and future usability.
Current Limitations on Importing Transferred Domains
As of now, there may be limitations regarding the import and integration of transferred domains on certain platforms. This means that after transferring a domain, the recipient might encounter restrictions or challenges in integrating and utilizing the domain across different blockchain ecosystems and services. It’s crucial to be aware of these potential limitations and to check with both the sending and receiving platforms for specific import policies and capabilities.
Future Updates Regarding Domain Imports
The landscape of Web3 domains is rapidly evolving, with ongoing developments aimed at improving compatibility and functionality. Freename is continually working on updates to enhance the import process and broaden the interoperability of Web3 domains. Keep an eye out for announcements and updates from Freename regarding new features and improvements that might affect domain transfers and imports.
How To Transfer a Web3 Domain To Freename
If you want to transfer your Web3 domain to Freename, make sure you check your registrar’s guidelines for any specific requirements. Here’s a concise overview that generally applies across various platforms:
Step 1: Unlocking the Domain
Log in to your Web3 domain registrar account and navigate to the domain management section. Unlock the domain for transfer, ensuring there are no restrictions, disputes, or unpaid fees.
Step 2: Initiating the Transfer
Obtain an authorization code (EPP code) from your current registrar. Provide this code and your account details to the new registrar, making sure all information is correct and completing any additional verification steps.
Step 3: Confirming the Transfer
Both registrars will send verification requests. Confirm the transfer by responding to these requests, typically via email links. Ensure both parties have completed all necessary confirmations.
Step 4: Finalizing the Transfer
The transfer will process on the blockchain, updating the domain records. Verify new ownership by checking the domain details in your digital wallet and registrar’s platform to ensure everything is correct.
Common Problems and Solutions
Transfer Delays
Solution: Transfer delays can occur due to network congestion on the blockchain or processing times required by the domain registrars. To mitigate these delays, ensure that all necessary information and authorizations are provided promptly. Monitor the network status and consider timing your transfers during periods of lower activity to avoid congestion.
Verification Issues
Verification issues often arise from incorrect or incomplete information. Double-check all entered details, such as email addresses, wallet addresses, and authorization codes. If you encounter persistent issues, reach out to customer support for both your digital wallet and the domain registrar. They can provide specific guidance and troubleshoot the problem.
Resolving Failed Transfers
Failed transfers can be frustrating, but they usually stem from either technical issues or incorrect data entry. If a transfer fails, review the error messages for specific clues. Common causes include invalid wallet addresses, insufficient funds to cover gas fees, or domain restrictions. Correct any errors and attempt the transfer again. If the problem persists, contact support for assistance.
Best Practices for Managing Web3 Domains
Effective management of Web3 domains is crucial for ensuring their security and longevity. Here are some best practices to keep your domains secure and well-maintained.
Keeping Your Wallet Secure
- Use Reputable Wallets: Always use well-known and reputable digital wallets like MetaMask, Trust Wallet, or similar options. These wallets have robust security features and are widely trusted within the Web3 community.
- Enable Two-Factor Authentication (2FA): If your wallet service offers 2FA, enable it. This adds an extra layer of security by requiring a second form of verification in addition to your password.
- Regular Updates: Keep your wallet software updated to protect against the latest security vulnerabilities. Developers regularly release updates that enhance security and functionality.
- Beware of Phishing Attacks: Always access your wallet through the official website or application. Be cautious of phishing attempts through emails or social media that may try to steal your login information.
Protecting Your Private Keys
- Store Private Keys Offline: Avoid storing your private keys on internet-connected devices. Use hardware wallets or cold storage options to keep your keys offline and secure.
- Backup Your Private Keys: Keep multiple backups of your private keys in secure locations. Consider using encrypted USB drives or other secure methods for storing these backups.
- Avoid Sharing Your Private Keys: Never share your private keys with anyone. Anyone with access to your private keys can control your domains and other digital assets.
- Use Strong, Unique Passwords: Ensure that the passwords for your wallet and any related accounts are strong and unique. Avoid using the same password across multiple platforms.
Regular Maintenance
Regularly review and update your domain information to ensure it remains accurate and up-to-date. This includes contact information, ownership details, and any associated wallet addresses. Keeping your information current helps prevent issues related to verification and transfer processes.
Mastering Web3 Domain Transfers
Transferring Web3 domains is essential for maintaining control and security over your digital assets. By following the correct procedures and adopting best practices, you can ensure a smooth and secure transfer process. Keep your digital wallets and private keys secure, regularly update domain information, and renew registrations timely. By implementing these steps, you can confidently manage and transfer your Web3 domains.

